



A white background photo isn't one standard. It's three different jobs sharing the same label: a corporate portrait that should keep the face dimensional, an ecommerce image that must meet marketplace rules, and a passport or visa photo that follows official guidance. Use the wrong setup and you'll get gray edges, clipped hair, flat skin, or an image rejected for a background that looks acceptable to the eye but fails a technical check.
The first decision isn't which backdrop to buy. It's which output you need. A photographer builds the light around that answer, and an AI workflow needs the same discipline in the input images.
Table of Contents
- What a white background photo actually has to do
- Studio lighting and backdrop setup that holds up
- Camera, lens, and exposure choices
- AI headshot generation and background replacement
- When to shoot it yourself versus generate it
- Export specs for LinkedIn and corporate use
What a white background photo actually has to do
A LinkedIn portrait, product cutout, and passport image can all look white on screen while following different rules. Corporate photography prioritizes expression, shape, and believable light. Ecommerce prioritizes clean separation and consistent presentation. Passport photography prioritizes a plain, evenly lit background with no distracting shadows or objects.
Amazon makes the ecommerce requirement especially exact. Its main product image uses pure white RGB 255,255,255, the product fills at least 85% of the frame, and the longest side measures at least 1,000 pixels, with 2,000 pixels recommended for best quality, as documented in this white-background product photography guide. Google Shopping also prefers solid white or transparent backgrounds and commonly expects the product to occupy about 75% to 90% of the frame.
Passport rules are different. The U.S. State Department accepts plain white or off-white backgrounds, and its guidance requires the background to be free of shadows, texture, lines, and objects, as summarized in the official U.S. passport photo guidance. The UK accepts any plain light-colored background, including cream, ivory, vanilla, and light grey, while black-and-white digital or paper photos aren't accepted, according to HM Passport Office requirements.
| Target | Background RGB | Min output size | Shadow tolerance | Common rejection |
|---|---|---|---|---|
| LinkedIn or corporate portrait | Clean white to soft off-white | Platform and directory dependent | Soft shoulder falloff is acceptable | Flat face, harsh halo, awkward crop |
| Ecommerce product image | Pure white, commonly RGB 255,255,255 | 1,000 pixels on the longest side for Amazon | Product shadow must stay controlled | Gray background, edge contamination, product too small |
| Passport or visa image | Plain white or off-white, depending on authority | Follow the issuing authority | Shadows across the head aren't acceptable | Texture, objects, uneven light, glare |
For professionals working across markets, “pure white” isn't always the most useful target. Independent passport guidance treats off-white as a neutral, uniform tolerance, while rejecting cream, beige, strong color casts, texture, and shadows, as explained in this passport background guide. The practical question is whether the image serves its official purpose, not whether every pixel reaches the same value.
The same principle applies to marketing content. If you're researching how AI systems surface brands and visual assets, ContentBuck's guide to SaaS mentions in AI offers useful context for thinking about discoverability beyond a single image file.
Studio lighting and backdrop setup that holds up
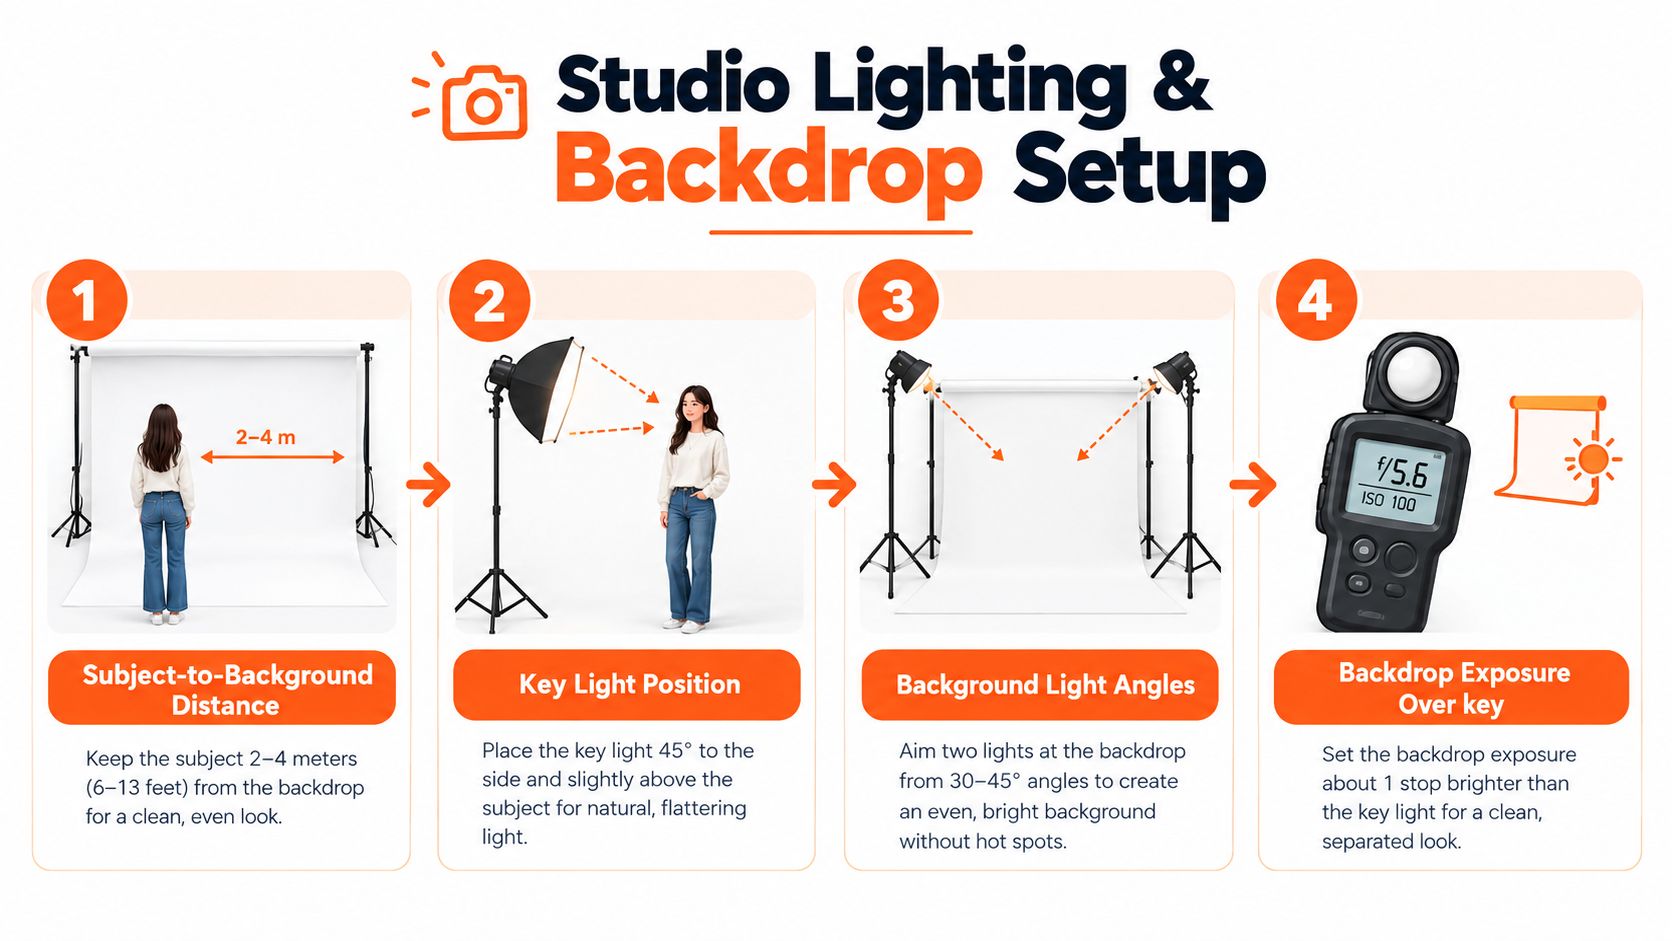
A white frame succeeds through separation. Put the subject too close to the background and light spills onto the face, shadows gather behind the head, and the background exposure becomes impossible to control independently.
For portraits, keep the subject at least 5 to 6 feet from the backdrop, then light the background separately with two lights positioned about 45 degrees to either side. Set those background lights 1 to 2 stops brighter than the subject. This method pushes the backdrop toward clean white while preserving dimensional light on the face, as described in this white-background headshot setup.
Build separation before adding brightness
Use a taut muslin or paper roll. Sweep the floor into the wall if you're photographing a standing subject or product, because a visible seam immediately makes the setup look improvised. Flag the background lights so they don't strike the subject. The point isn't just to make the room brighter. It's to create two exposure zones that you can meter and adjust independently.
Use one soft key, such as a 45 cm octa or a 60 by 90 softbox, camera-left at roughly a 30-degree downward angle. Place a reflector camera-right to open the shadow side without flattening the face. A hair light from above separates dark hair from the white field for a corporate portrait.
Practical rule: Brighten the background, not the subject. If the face loses shape, the key or fill is doing the wrong job.
For passport work, remove the hair light. A rim glow creates a halo, and official specifications are concerned with a plain, shadow-free background rather than a stylized edge effect. Keep glasses free from glare, position the face squarely, and check the background for lines, texture, and objects before you shoot.
More detail on key placement, subject separation, and background control is available in this guide to the best lighting for headshots. The studio method beats a single-light setup because it gives you control over the face and the background instead of forcing one exposure to solve both.
Camera, lens, and exposure choices
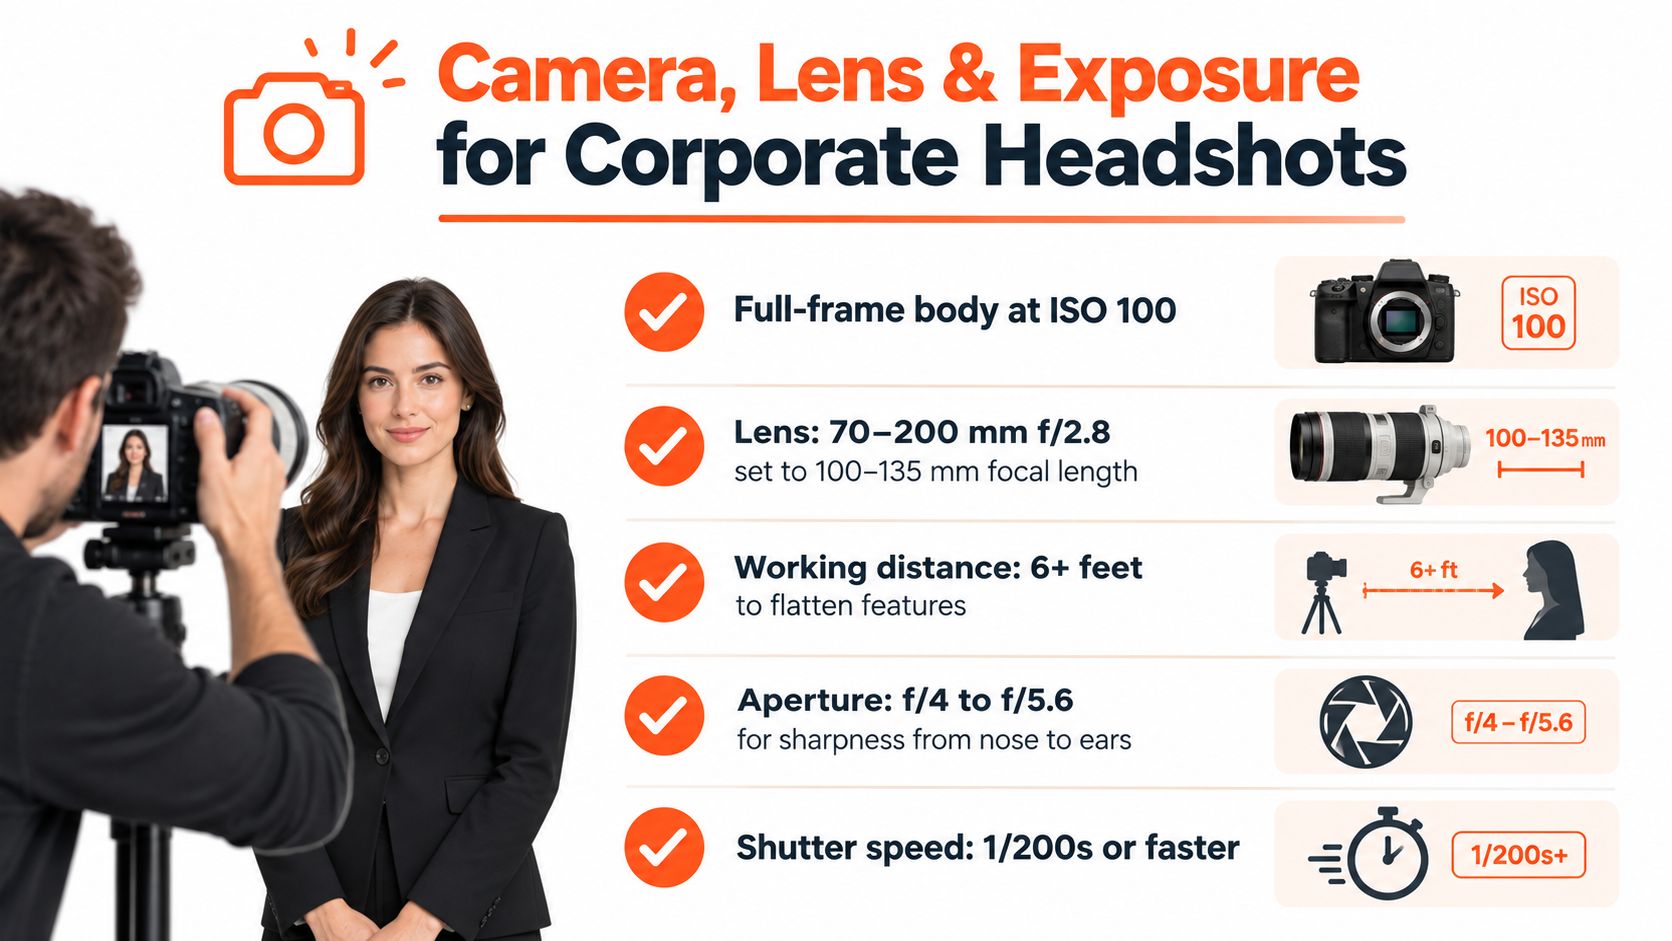
For a corporate or LinkedIn portrait, a full-frame body at ISO 100 paired with a 70 to 200 mm f/2.8 lens works well around 100 to 135 mm. That focal length gives you comfortable working distance and avoids the exaggerated facial proportions produced by shooting too close with a wide lens.
Set the key for the face first. For a corporate portrait, meter the skin around f/5.6 to f/8, then meter the background separately and place it 1 to 2 stops hotter. A handheld incident meter is precise, while a spot meter aimed at the white area gives you a practical camera-based check.
Match the lens to the output
Product cutouts need edge-to-edge sharpness, so an 85 mm prime stopped down to f/8 to f/11 is a sensible starting point. Corporate portraits need separation and a more flattering perspective, so the longer zoom range gives you framing flexibility without pushing the camera into the subject's personal space.
Shoot tethered in RAW. RAW files preserve room for recovering chin shadows, stray hairs, and small exposure errors. Still, don't use RAW as an excuse for a careless capture. Make a reference JPEG and inspect the histogram to confirm the white is already reading close to the right edge before retouching.
AI background replacement needs a different input. A pre-burned white backdrop gives a replacement system little edge information. Use a neutral mid-gray backdrop or an uncluttered wall, expose for the face, leave generous headroom, and capture 12 to 20 frames with varied expressions. Clean hairlines, varied angles, and consistent focus give the system useful information for separating the person from the background.
AI headshot generation and background replacement
AI generation is practical when you need a professional portrait without arranging a studio visit. Upload 10 to 20 phone selfies, with varied lighting, angles, and expressions. Avoid sunglasses, hats, busy patterns, and group photos. Include smiling and neutral expressions so the final set doesn't force one facial mood across every image.
AiHeadshots is built from Studio Pod, an automated headshot studio in Houston that has photographed 10,000+ real professionals since 2019. Founders Joseph West and Chris Bailey are photographers who built an AI product, rather than a software team retrofitting open models. The service accepts phone selfies, requires no studio visit, and delivers 30+ studio-grade headshots in approximately 30 minutes.
The available tiers are Basic at $29, Professional at $39, and Executive at $59. Teams receive volume pricing at 10 or more seats, priced at $22 to $29 per seat. AiHeadshots reports 30,000+ customers served, 255,000+ headshots delivered, and a 4.9-star rating. It also offers a 100% money-back guarantee within 14 days.
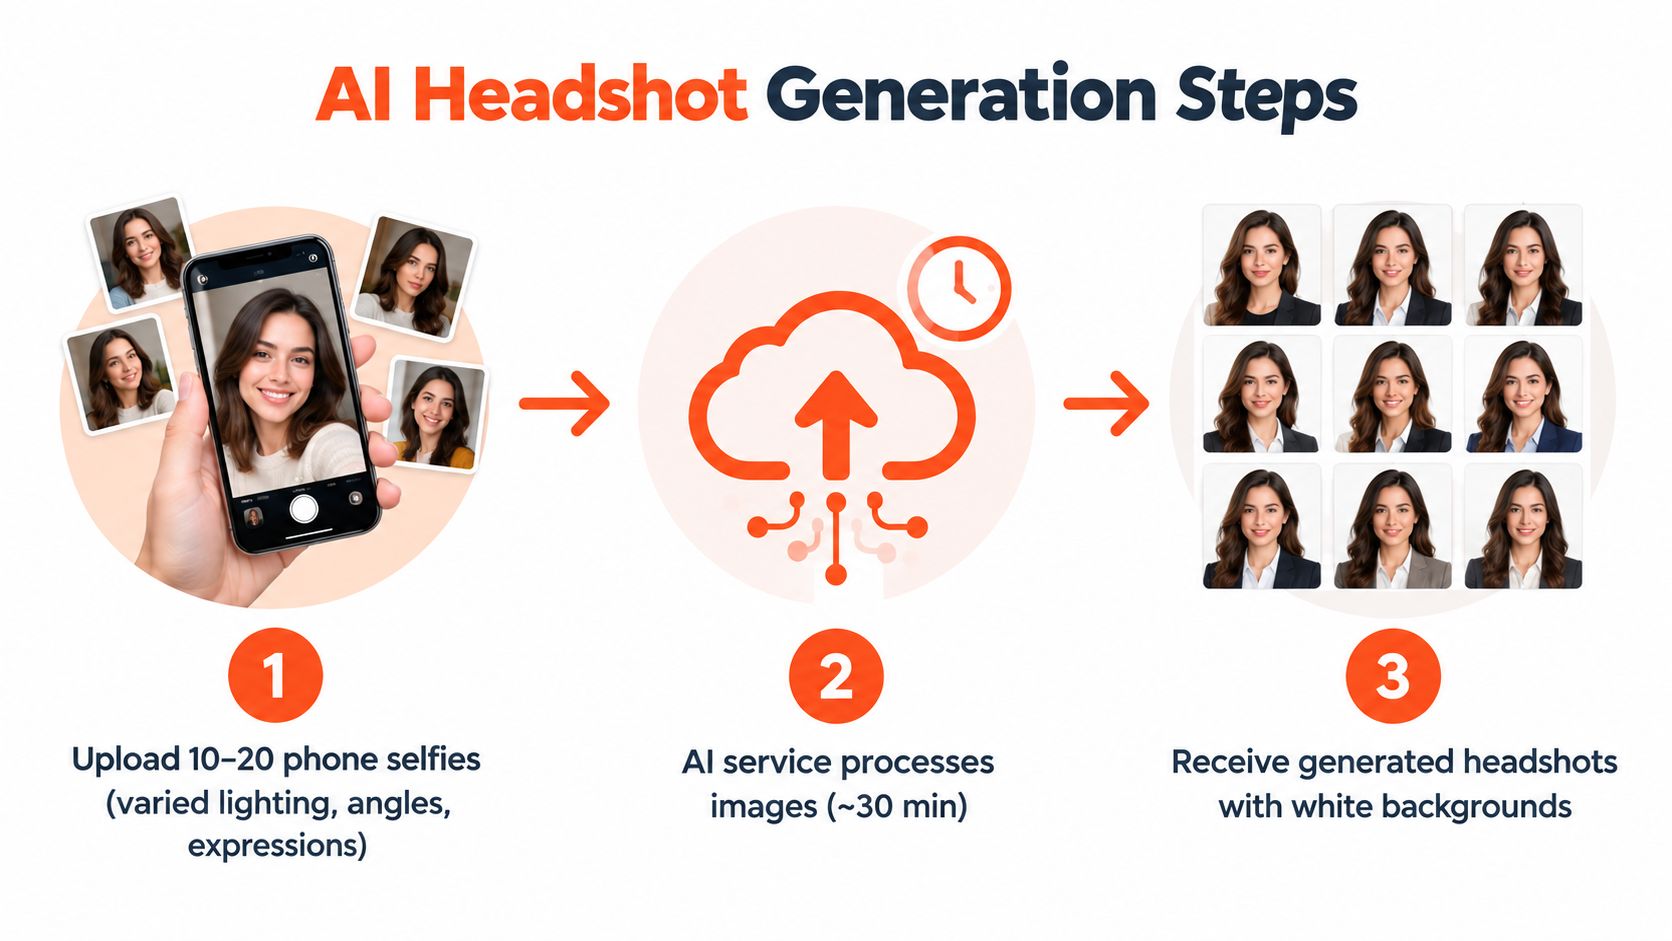
The workflow is straightforward, but the input still determines the ceiling. Consistent exposure, visible hair edges, and varied expressions produce more credible results. Hands, jewelry, and asymmetric earrings remain difficult details for automated generation, so inspect the full set before choosing a final image.
If you're adding visual assets to a resume, the practical formatting issues are separate from portrait generation. Resumey.Pro's guide to images in a resume with Markdown syntax is useful for understanding how images and links behave in a structured document.
For a pure background change, Photoshop and remove.bg can replace a backdrop quickly, but replacement quality depends on the original lighting. A face lit from one direction against a background lit from another still looks composited. The deeper workflow is covered in this guide to changing a photo background to white.
AiHeadshots retains input files for 7 days, generated outputs for 30 days, and billing records for 90 days. Those retention periods matter for teams handling employee portraits and should be part of the procurement conversation.
When to shoot it yourself versus generate it
The choice depends on the intended use, not a blanket belief that studio photography or AI always wins. A photographer day rate runs $300 to $600 or more, and retouching adds $15 to $50 per image. A half-day shoot covers roughly 8 to 15 employees, placing the per-person cost around $40 to $80 under that model.
AI generation charges per person rather than per production day. AiHeadshots starts at $29, with Professional at $39 and Executive at $59. For a ten-person team, that creates a direct comparison between roughly $400 to $800 for the photographer model and $290 to $590 for the AI tiers, before accounting for scheduling and coordination.
| Factor | Photographer | AI generation | Hybrid |
|---|---|---|---|
| Per-person planning | Requires scheduling and attendance | Each person uploads independently | One planned reference shoot plus uploads |
| Visual control | Highest control over pose, light, and styling | Strongest with clear, varied input selfies | Reference lighting anchors the set |
| Delivery | Depends on the photographer's editing schedule | AiHeadshots delivers 30+ headshots in about 30 minutes | Fast after the reference setup |
| Best fit | Annual reports, badges, banners, campaigns | LinkedIn and corporate profile crops | Teams needing common visual direction |
A real studio earns its cost when the image must survive several formats, not just a square profile crop.
Photography wins for printed annual reports, conference badges, and large-format signage where the same face must remain consistent across very different reproduction sizes. AI wins for remote teams, quick refreshes, and professionals who need a polished white-background portrait without arranging a shared shoot.
A hybrid workflow gives teams a middle path. Establish one carefully lit reference frame, use it to define the visual direction, generate the remaining portraits, then apply a shared Lightroom color treatment. That preserves a common tone without requiring every employee to attend the same session.
Competitors including HeadshotPro, BetterPic, Aragon, Secta, and ProPhotos follow their own workflows and packages. Compare input requirements, delivery timing, background controls, editing policy, and privacy terms. The meaningful AiHeadshots distinction is its photographer heritage through Studio Pod, its $29 entry price, and its approximately 30-minute delivery.
Export specs for LinkedIn and corporate use
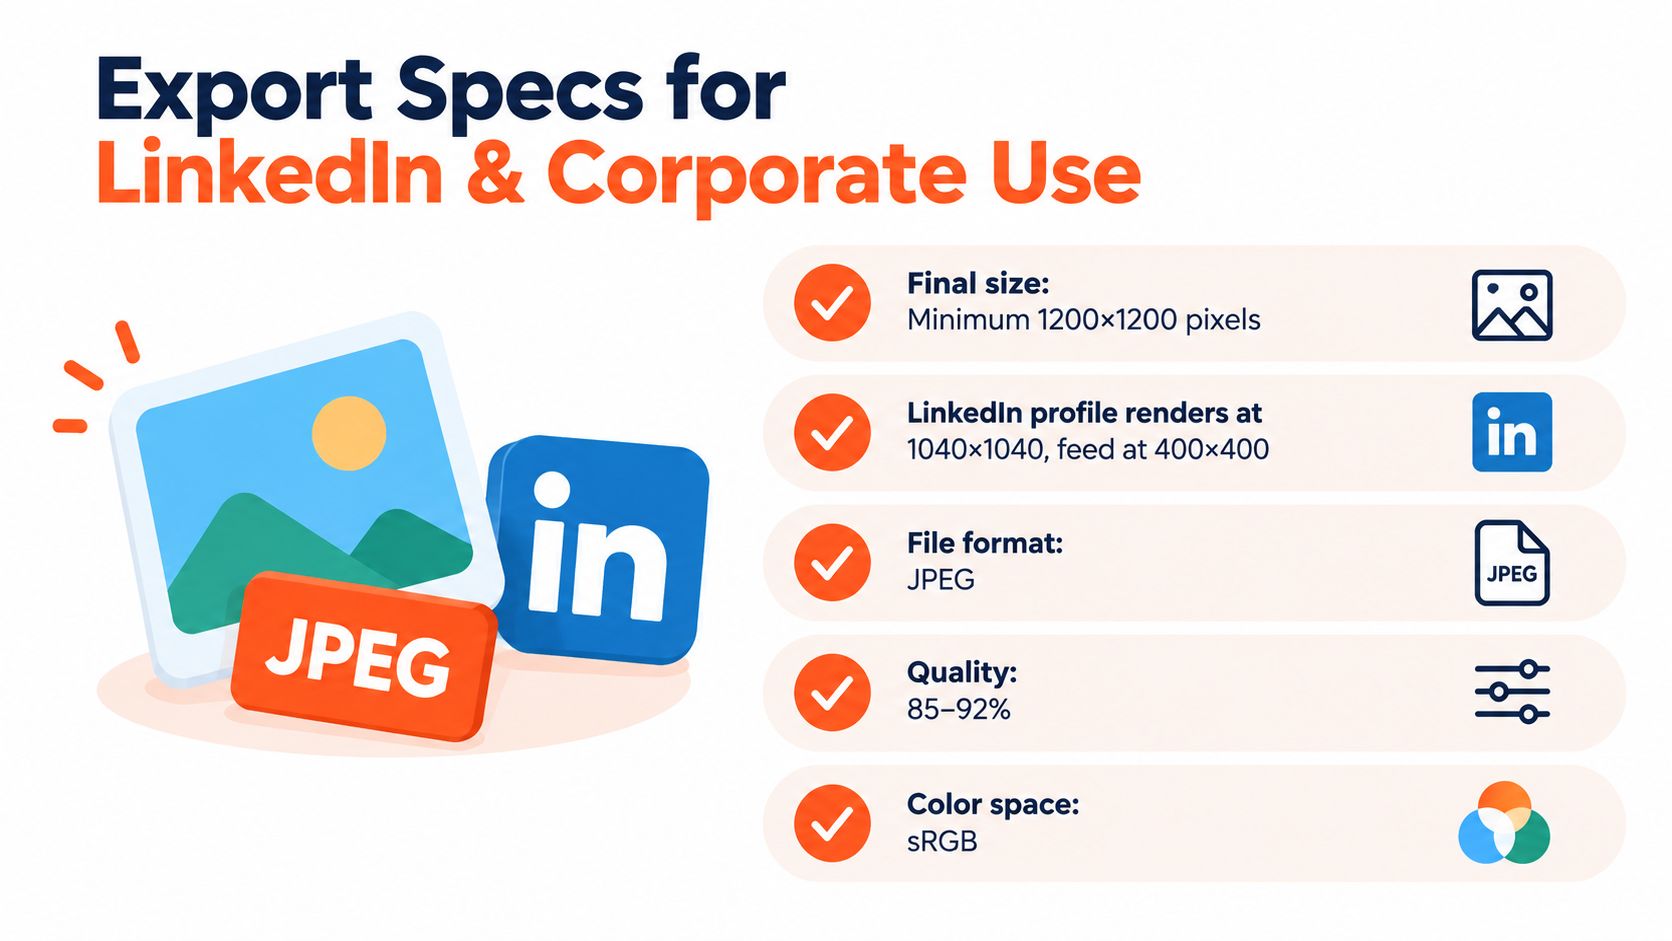
Export the master square at 1,200 by 1,200 pixels or larger. LinkedIn profile images commonly render at 400 by 400 pixels in feeds and 1,040 by 1,040 pixels on profile pages, so a larger source stays cleaner after platform processing. Use JPEG, sRGB, and quality between 85 and 92. Keep the file under 500 KB when the destination imposes that limit.
For the crop, let the face occupy about 60% of the frame and place the eyes near the upper third. That framing keeps the portrait readable at small sizes without turning the image into a tight passport-style crop. Corporate directories, Microsoft Teams, Slack, and Zoom work well with square files at 800 by 800 pixels, provided the original remains sharp.
Keep the team visually consistent
A ten-seat rollout looks disorganized when every portrait has a different white balance, crop, or background tone. Lock the exposure, background treatment, and crop before processing the set. In Lightroom, create separate presets for skin, background exposure, and overall contrast, then apply the same controls to generated images before batch export.
Use a searchable naming pattern such as firstname-lastname-headshot-2025.jpg. A predictable filename makes the asset library easier to maintain when the team refreshes portraits later.
If you need automated resizing for a profile destination, the RenderIO LinkedIn resize API provides a focused option for preparing files. For platform-specific dimensions and cropping guidance, see this LinkedIn profile photo dimensions guide.
Inspect the final file on both a white interface and a darker interface. Gray halos, warm corners, clipped hair, and visible cutout edges often disappear during editing and reappear after upload. A white background photo is finished only when the exported file still looks intentional at the size where people will see it.
Upload 10 selfies to AiHeadshots, choose a white background, and receive 30+ professional headshots in about 30 minutes, starting at $29.
