



Professional headshots with AI already produce usable results. The catch is that the output depends less on clever prompts than on the quality and consistency of the photographs you upload. That's the same rule we've seen across more than 10,000 real professional shoots since 2019 at Studio Pod in Houston, where photographers Joseph West and Chris Bailey built AiHeadshots from studio practice rather than retrofitting an open image model.
A polished result still begins with photography fundamentals. Poor lighting, inconsistent angles, sunglasses, group shots, and forced expressions give any image system conflicting information. The following workflow treats AI headshots as a photography job first and a software task second.
Table of Contents
- AI headshots already work, and the catch most guides ignore
- Prep your selfies like a photographer would prep a studio
- Uploading and generating without wasting a generation cycle
- Picking the right styles, backgrounds, and lighting for your use case
- AI headshots vs a traditional photographer in real numbers
- Selecting your finals and doing the retouch pass
- The full workflow at a glance, and what to do next
AI headshots already work, and the catch most guides ignore
Professional photos have a measurable effect on profile visibility. Profiles with a professional photo are reported to receive 21 times more profile views, 9 times more connection requests, and up to 36 times more messages than profiles without one, according to reported professional-photo performance data. The same source reports that All-Star profiles, which require a professional photo, are 40 times more likely to receive opportunities and 18 times more likely to appear in search results.
That doesn't mean any synthetic portrait will work. A headshot has two jobs. It needs to look like you, and it needs to communicate the right professional context. A technically sharp image with waxy skin, a warped ear, or an unfamiliar jawline fails both tests.
Why input quality controls output quality
A camera captures a single moment. An AI headshot system studies a collection of images and builds a visual interpretation of your face. That gives it more flexibility, but it also gives it more ways to misunderstand you. If one selfie is backlit, another is taken under green office lighting, and a third uses a wide-angle camera from below, the system has to reconcile incompatible evidence.
Our experience shooting real people has made the pattern clear. The strongest outputs usually come from inputs that resemble a controlled studio session. The face is visible, the lighting is even, the expression is natural, and the photographer has removed variables before the shutter is pressed.
Recruiters in one blind-test study correctly identified AI-generated headshots only 39.5% to 40% of the time, while 76.5% preferred the AI image in side-by-side comparisons, according to coverage of the recruiter test. The same coverage found that quality control matters. Low-quality services were detected 58.9% of the time, compared with 29.2% for premium services.
The lesson is simple. AI headshots work when you supply photographer-grade material and inspect the result with a photographer's eye. They don't work as a shortcut around preparation.
Prep your selfies like a photographer would prep a studio
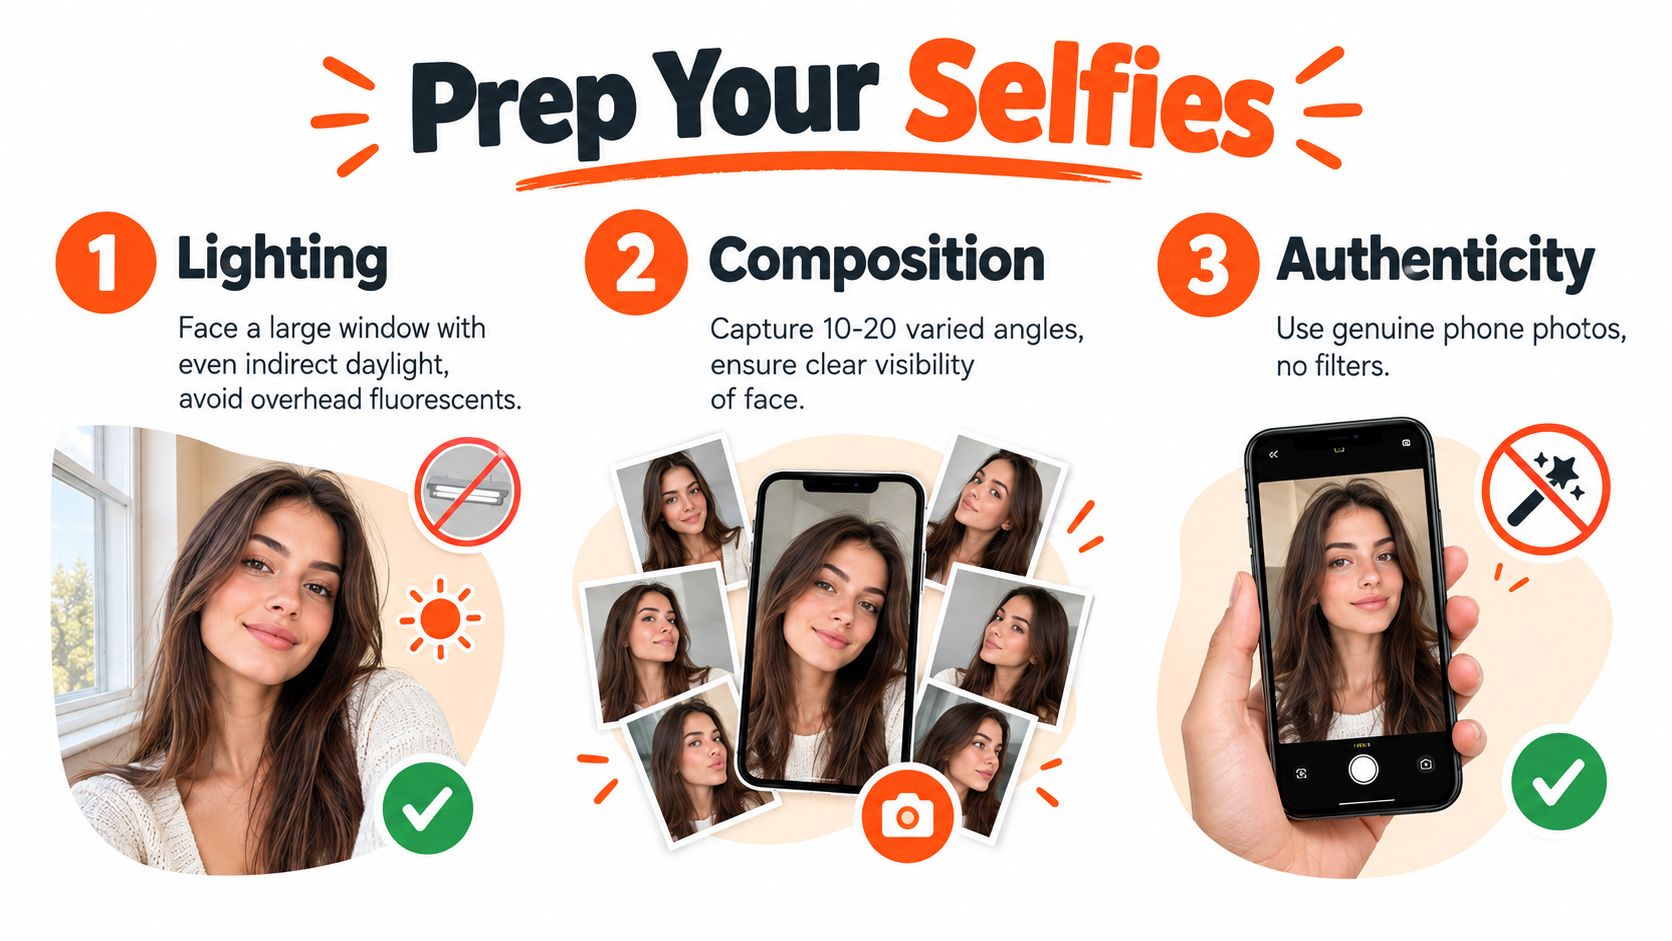
Start with light. Face a large window and use even, indirect daylight. Stand a short distance from the glass so the light wraps around your face instead of creating a bright patch on one cheek. Avoid overhead fluorescents, mixed color temperatures, and hard side light. Those sources create deep shadows under the brow and nose, which makes facial structure harder to interpret.
Your phone should sit at eye level. Frame your head and upper shoulders, leaving enough space around the hair and jaw. Turn your face slightly, roughly 10 to 15 degrees off-axis, rather than photographing yourself dead-on. Push your chin slightly forward and down. That small adjustment defines the jawline without creating a strained pose.
Build a consistent set of inputs
Use a relaxed smile and keep your eyes on the lens. Think about the person you see just before a photographer presses the shutter. That produces a more credible expression than holding a broad smile for a long series of selfies.
Wear a solid color and a simple neckline. Busy patterns, small stripes, and prominent logos create unnecessary visual noise. If you need several professional contexts, change the wardrobe between small groups of images, but don't mix radically different clothing styles in every frame.
Take 10 to 20 phone selfies with the same general lighting, background, and camera height. Consistency gives the system a clean reference set. Variety should come from small changes in expression and angle, not from switching between a bathroom mirror, a car, and a dim restaurant.
A stack of books works as a phone stand. Use the timer, then shoot a short burst while you make small changes to your expression and head position. Remove filters. Don't use beauty mode, portrait blur, or images where another person is partly visible. Our selfie preparation guide covers the same setup with additional examples.
Practical rule: Give the system a coherent studio session, not a random archive of your camera roll.
Uploading and generating without wasting a generation cycle
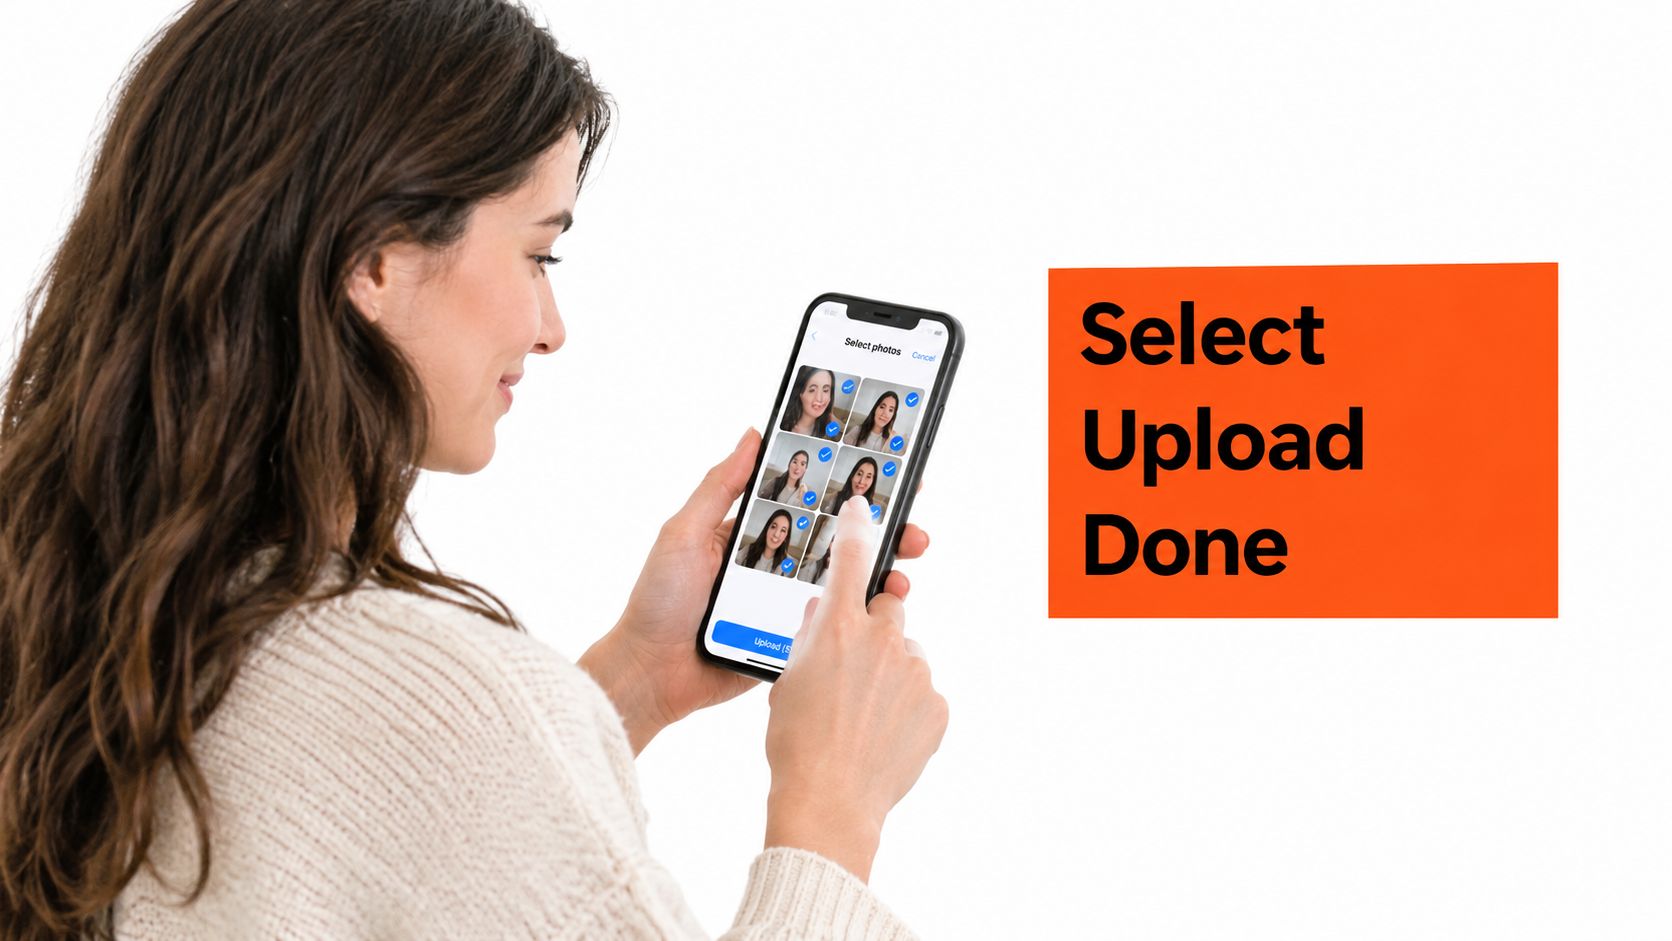
The useful input range is 10 to 20 selfies. Fewer than 10 gives the system less variation in expression, angle, and facial detail. More than 20 often introduces conflicting lighting and styling cues. The point isn't to upload every photo you have. It's to upload a controlled set that describes the same person clearly.
Choose sharp JPG or PNG files. Avoid HEIC files if the upload page doesn't support them, and don't rely on heavily compressed screenshots. Use images with enough resolution to show the eyes, hairline, ears, and jaw without blur. Remove sunglasses, group shots, extreme crops, and images where your face is partly covered.
What happens after upload
After you upload, the system analyzes your facial features and uses them as the identity reference for style synthesis. It then creates candidate portraits across selected clothing, backgrounds, crops, and lighting patterns. The product workflow delivers 30 or more studio-grade headshots in approximately 30 minutes, with the wider generation process producing 40 or more candidate images depending on the selected package and style set. Review the available pricing and package details before uploading, because the initial generation is a paid workflow rather than an open-ended studio session.
Treat the first generation as a planned shoot. Decide whether you need a LinkedIn image, a corporate directory portrait, an executive profile, or an actor headshot. That choice gives you a clear standard for judging the results.
While the system works, prepare a shortlist of where the image will appear. LinkedIn rewards recognizability and approachability. A law firm website needs credibility and restraint. An actor portfolio needs range. Selection becomes faster when you know the job each image must perform.
Picking the right styles, backgrounds, and lighting for your use case
A style thumbnail is not decoration. It tells you how the face will be lit, how tightly it will be cropped, and what professional signal the image will send.
Corporate headshots usually benefit from a neutral gray or soft studio background, a clean three-quarter lighting pattern, and a jacket with a shirt. The result should feel controlled without looking stiff. A flat, front-lit pose often removes too much facial shape, so look for a thumbnail with gentle light from one side and visible definition around the cheek and jaw.
LinkedIn gives you more room to appear open and approachable. A slightly warmer background, relaxed clothing, and a natural smile usually fit better than a formal boardroom treatment. The image still needs clean separation from the background, especially at the hairline and shoulders.
Executive portraits can carry darker backgrounds and more sculpted light. A tighter crop gives the face greater authority, but the shadows need to remain readable. Too much contrast makes the image dramatic rather than credible.
Actor headshots need variety. Include three-quarter and profile angles, different wardrobe options, and lighting that shows more than one emotional register. A single polished corporate portrait won't give a casting team enough range.
Match the wardrobe to the background
Use a simple contrast rule. Pair a dark jacket with a lighter background, and a light shirt or jacket with a darker background. Avoid choosing clothing and background tones that merge at the shoulders. That weakens the crop and makes the portrait feel unfinished.
Lighting direction shapes perceived structure. Light from above and to the side defines cheekbones. Light from directly in front flattens the face. A warmer background can make a relaxed expression feel more welcoming, while a cooler gray backdrop supports a more formal setting. Our guide to lighting for professional headshots explains how to read those choices before selecting a style.
AI headshots vs a traditional photographer in real numbers
The choice is not just between modern and old-fashioned. It's a choice between speed, control, coaching, and the kind of image library you need.
An AI workflow starts at $29 for a generation package and can deliver studio-style images in roughly 30 minutes. AiHeadshots offers Basic at $29, Professional at $39, Executive at $59, and Teams pricing from $22 to $29 per seat for volume orders of 10 or more seats. A traditional photographer in a US metropolitan area commonly charges $300 to $600 or more for a session, while a top-tier studio can charge $1,200 or more. Those photographer rates are also discussed in the one-shot cost breakdown.
| Factor | AI headshots | Traditional photographer |
|---|---|---|
| Starting price | $29 package | $300 to $600 or more for a session |
| Delivery | Approximately 30 minutes | Often one to three weeks from booking to retouched files |
| Output | 30 or more studio-grade headshots, with 40 or more candidates in the wider workflow | Typically 5 to 15 final edits |
| Scheduling | No studio visit required | Requires booking, travel, and a dedicated session |
| Direction | Preparation happens before upload | Photographer coaches expression, posture, and wardrobe live |
| Best fit | Fast updates, remote professionals, teams, and multiple styles | High-touch branding, complex wardrobe, and authentic movement |
The time cost is different too. Selfie preparation takes about 15 minutes when the phone, window, and wardrobe are ready. A physical shoot takes a half-day block once travel, parking, setup, photography, editing, and delivery are included.
A real photographer wins when the session needs live correction. We can fix a collar, catch a distracting reflection, adjust a hand, or draw out an expression that only appears during conversation. A camera also records genuine movement and micro-expressions without reconstructing them.
AI wins on price, speed, volume, and access. It works particularly well for people outside major markets, professionals who need several background treatments, and teams that need consistent profile imagery without arranging a shared shoot.
For a fast profile refresh, choose AI. For a complex personal-brand campaign or a session where coaching is central to the result, choose a photographer.
Selecting your finals and doing the retouch pass
Don't choose the first image that looks polished. Screen the set like a retoucher.
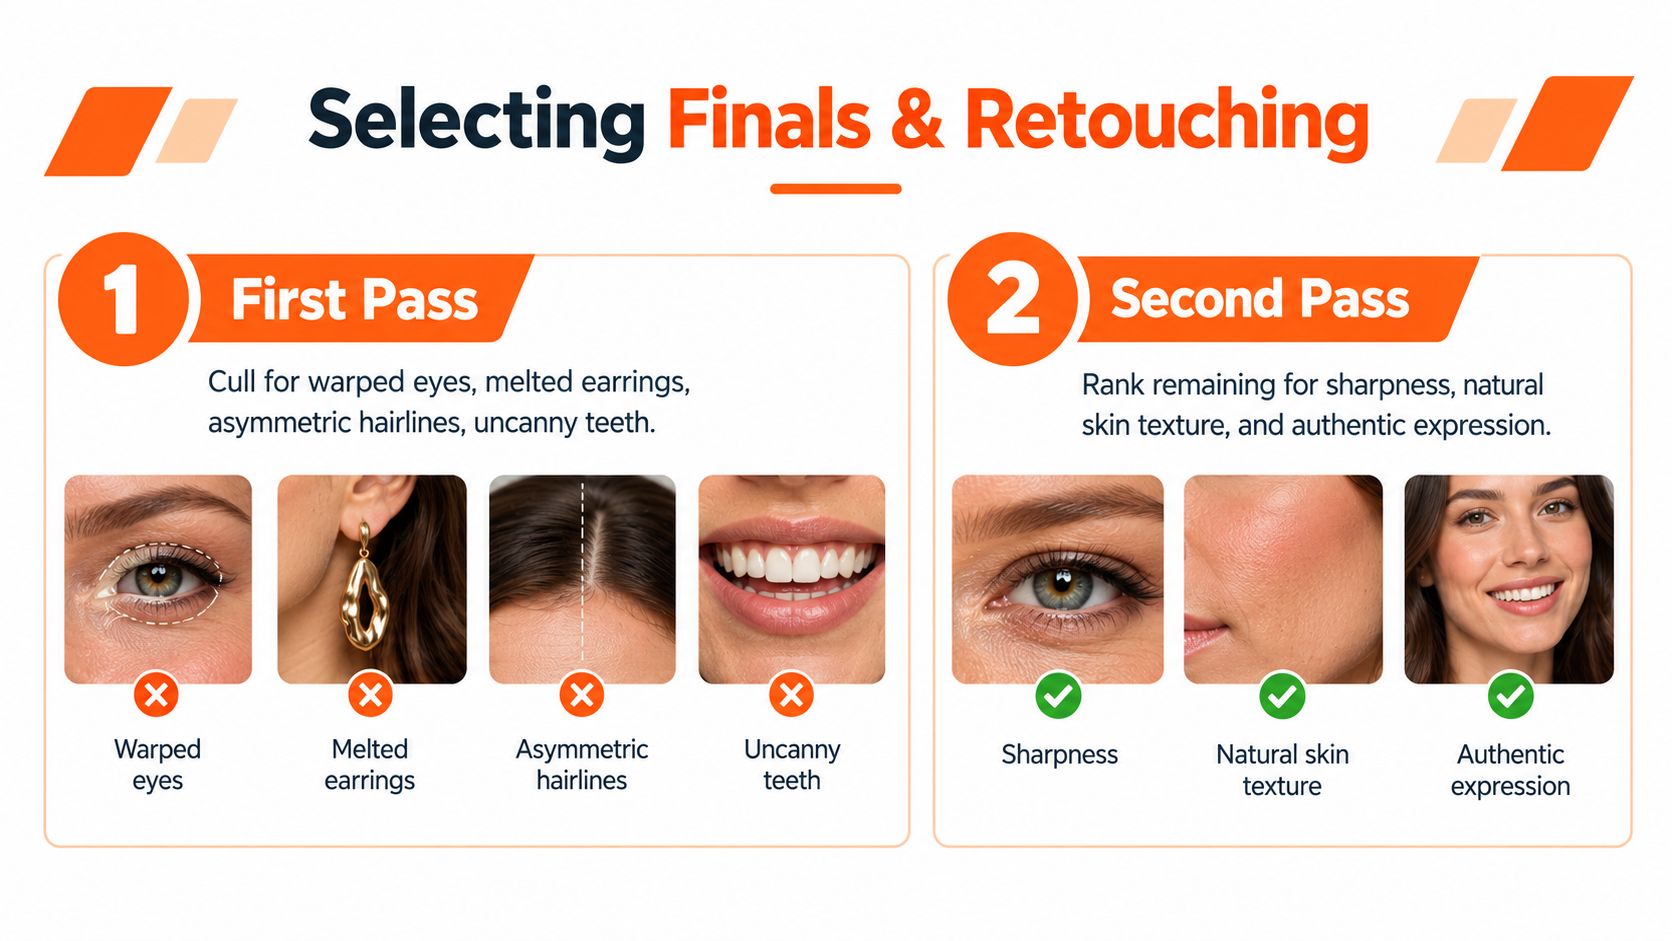
The first pass is technical. Look closely at the eyes, ears, hairline, teeth, jewelry, collar, and fingers. Reject warped pupils, melted earrings, asymmetric hairlines, uncanny teeth, and background distortions. Zooming in matters because an image that looks convincing at thumbnail size can fail on a company bio or speaker page.
The second pass is about expression. The strongest portraits usually have relaxed eyes, a slight closed-lip smile, and a head tilt that feels natural rather than posed. Compare images at the same size and ignore the background for a moment. Ask which version still looks like you after the styling is removed.
Keep a small, useful final set
Select three to five finalists across different lighting setups. You want options for LinkedIn, a company site, a speaking bio, and other professional profiles without choosing five versions that all communicate the same thing.
The retouch pass should be restrained. Apply light skin smoothing, subtle dodge and burn around the cheekbones, a small white-balance correction, and a final crop for each destination. Professional portrait retouching traditionally cleans skin, color, small distractions, and clothing while preserving a realistic appearance, as described in this overview of professional headshot post-production.
Don't blur every pore. Don't sharpen the eyes until they look cut out. Don't use plastic AI smoothing that removes the texture people expect from a real face. The target is a photograph of you on a good day, not a filter applied to a stranger.
Technical review also needs a representation check. Research on Stable Diffusion XL across 93 stigmatized identity categories found systematic differences in how faces are rendered, according to technical reporting on bias in image generation. A manual likeness review is essential, particularly for people whose hair, skin tone, facial features, or cultural presentation are poorly represented by a given system.
The full workflow at a glance, and what to do next
A reliable professional headshot workflow has seven stages. Keep each stage purposeful.
- Prepare the inputs: Set up near a large window, place the phone at eye level, and take 10 to 20 consistent selfies in about 15 minutes.
- Choose the use case: Decide between corporate, LinkedIn, executive, and actor styles before generation.
- Upload clean files: Use clear JPG or PNG images without filters, sunglasses, group framing, or inconsistent lighting.
- Generate the set: Allow approximately 30 minutes for the system to create the candidate portraits.
- Cull technical flaws: Remove warped eyes, strange teeth, distorted jewelry, uneven hairlines, and damaged backgrounds.
- Rank the expressions: Prioritize recognizable eyes, relaxed facial muscles, and a natural head position.
- Retouch the finalists: Make small corrections to skin, color, lighting balance, and crop, then export the versions needed for each platform.
The workflow is fast because the preparation happens before generation. It also protects credibility. LinkedIn allows AI-created or AI-enhanced profile photos only when the image still reflects the user's likeness, according to coverage of LinkedIn's authenticity position. Polished is useful. Misleading is not.
Data handling deserves the same attention as image quality. AiHeadshots' published policy states that uploaded selfies are deleted within 7 days of headshot generation, generated headshots are retained for 30 days after delivery, and account information is retained for 90 days after deletion for billing records, as detailed in the published privacy policy. The company's data-management policy says the service is operated by Studio Pod in Houston, Texas and retains data only while it serves a clear purpose, as described in its data-management and retention policy.
AiHeadshots delivers 30 or more studio-grade headshots from 10 to 20 phone selfies, includes a 100% money-back guarantee within 14 days, and provides commercial usage rights for the delivered images. Visit AiHeadshots to upload your selfies, choose a professional style, and receive a practical set of headshots without booking a studio visit.
Upload 10 selfies, select your use case, and review your first studio-style headshots in about 30 minutes. Visit AiHeadshots to choose the $29 option or compare plans for executive and team portraits.
