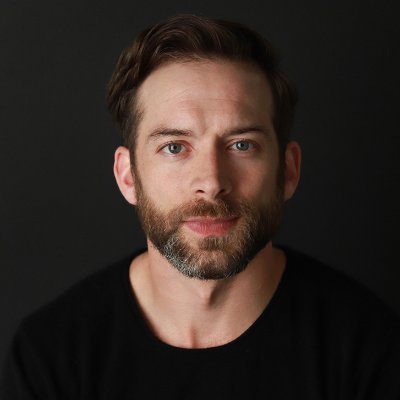
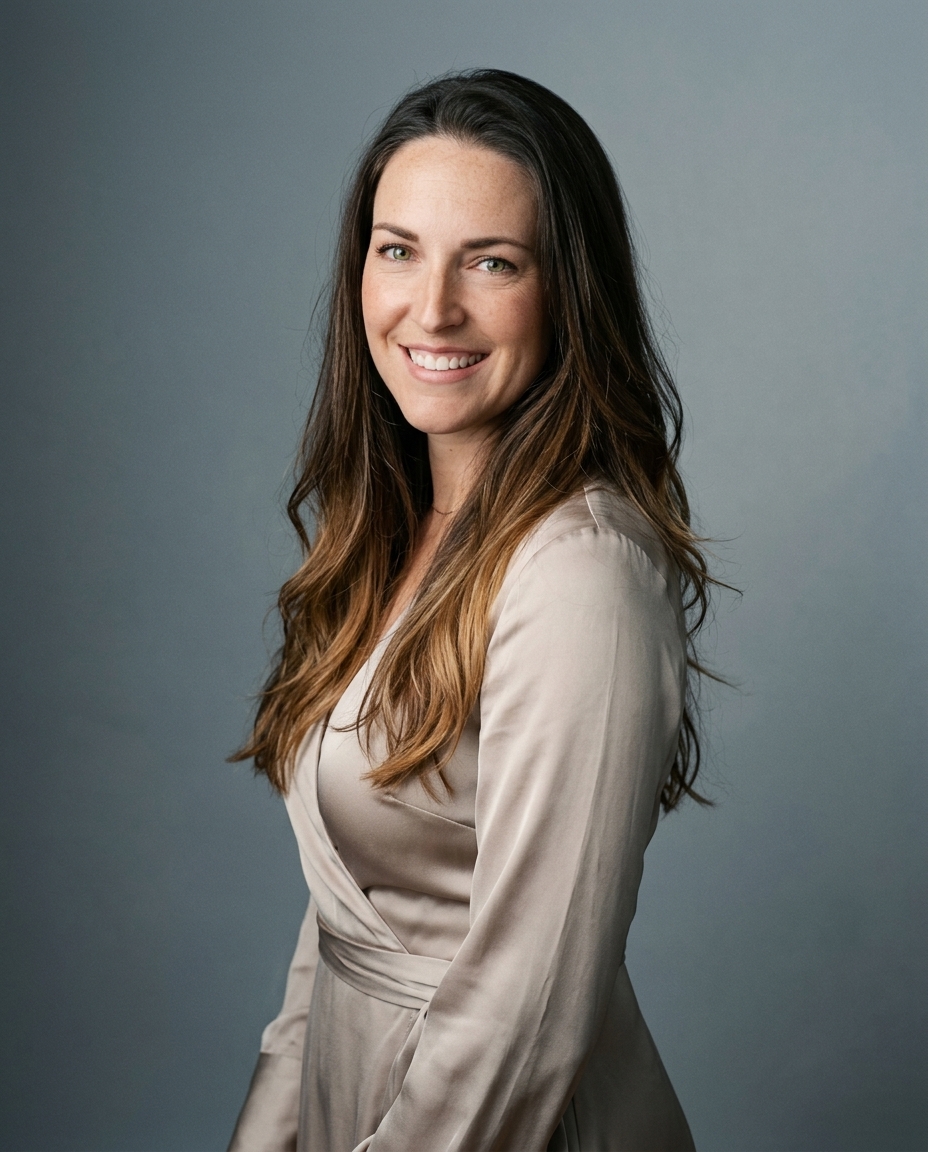

Most blemish retouching fails for the same reason. It removes evidence of skin instead of removing the blemish. That's why a 2025 Journal of Digital Imaging finding matters: 68% of users in corporate LinkedIn profiles felt AI-edited headshots appeared too artificial, reducing trust. The problem isn't cleanup. It's over-cleanup.
A professional headshot needs restraint. Temporary distractions come out. Texture stays. Pores stay. Shape stays. Credibility stays. If you've been comparing one-click tools, this broader guide to Upscaling and retouching with AI is useful context, but a key difference in portraits comes from knowing what not to smooth. Good results also start before editing, which is why solid capture habits matter as much as retouching. Our own selfie prep guide focuses on that first step.
Table of Contents
- The truth about removing blemishes
- Your foundation for non-destructive editing
- The core technique for clean blemish removal
- Advanced texture control with frequency separation
- Sculpting with light using dodge and burn
- Team consistency and the automated professional
The truth about removing blemishes
Most tutorials for photo editor remove blemishes work backwards. They chase speed first, then try to recover realism after the skin has already been flattened. That doesn't work. Once texture is smeared into a soft patch, the portrait stops reading like a real face and starts reading like edited software output.
We've seen this in studio work for years. The cleanest retouch isn't the one with the least visible skin detail. It's the one where the viewer doesn't notice the retouch at all. Temporary acne, a shaving nick, a random dry spot, those are distractions. Natural pores, tonal variation, and the structure of the face are not.
Practical rule: Remove what won't be there next week. Keep what makes the person look like themselves.
That distinction matters more in business portraits than in beauty work. Recruiters, clients, and colleagues aren't looking for fantasy skin. They're looking for a face that feels polished and believable. That's why the trust issue matters so much in professional images. A headshot can be tidy and still feel honest. It can also be technically clean and still feel fake.
The strongest retouching workflow isn't built around deletion. It's built around preservation. You preserve texture. You preserve color relationships. You preserve light across the cheeks, forehead, and jaw. Then you remove only the things that distract from the person.
Your foundation for non-destructive editing
If you want professional results, start with file structure. Not with tools. Not with presets. Not with a skin smoothing slider.
The standard workflow for skin retouching uses the Spot Healing Brush with Content-Aware sampling on a dedicated retouch layer so the original texture stays intact. That layer-based approach is the difference between reversible editing and permanent damage. If you work this way, you can reduce an edit, mask it, or delete it cleanly later. If you don't, every correction compounds.

Set up the file before you retouch
Open the portrait. Keep the background layer untouched. Add a blank layer above it and name it Retouch. In Photoshop, turn on Sample All Layers so healing tools read the underlying image while writing changes only to the empty layer.
That one move fixes a lot of beginner errors. You can see exactly what you changed. You can lower opacity if you went too far. You can erase one bad correction without harming the rest of the file. If you're building portraits from uploaded phone images, clean source files matter too. This practical note on uploading selfies well gets the input quality right before editing begins.
Non-destructive retouching gives you room to be subtle. Subtlety is what makes a headshot look expensive.
Why cheap apps break skin fast
A lot of mobile editors and simple web apps collapse the process into one flattening move. They blur uneven areas until the blemish disappears. The problem is that skin detail disappears with it. Fine pores, tiny transitions in highlight and shadow, and natural grain all get wiped at the same time.
That's why photographers prefer layered files and tool-specific edits. You aren't trying to create smooth skin. You're trying to create undistracted skin. Those are different outcomes.
A good setup also slows you down in the right way. It forces intention. That's useful. Fast retouching isn't the same as careless retouching.
The core technique for clean blemish removal
The Spot Healing Brush is still the fastest manual fix for isolated blemishes. Used well, it's precise. Used poorly, it creates gray smudges and muddy texture.
The first rule is scale. Adobe's own documentation notes that the brush should be slightly larger than the target spot so the tool can copy surrounding texture and fill the area cleanly through the Spot Healing Brush workflow in Photoshop. In practice, that means just larger than the blemish, not dramatically larger.

Use the brush like a retoucher, not a paint roller
Zoom in hard. For real cleanup, that usually means 200% to 300%. At normal screen size, you won't see where texture begins to break. At pixel view, you will.
Then work with restraint:
- Size the brush correctly. Keep it about 1.5x larger than the blemish so the surrounding clean skin gives the tool useful texture to sample.
- Click for small spots. Don't scrub over a pimple like you're painting a wall. Single clicks keep the correction localized.
- Keep Content-Aware and Sample All Layers on. That lets the tool read nearby detail while preserving your original file below.
- Watch for mud. If the patch turns waxy, undo it and reduce the area you're healing.
- Check the portrait at normal view. A fix that looks perfect at 300% can still look repetitive or stamped when you zoom back out.
You can study finished portrait styles on our headshot examples page, but the pattern is always the same. The skin still looks like skin.
A good healing pass removes the interruption, not the surface.
Where clone stamp takes over
Spot Healing is excellent for round, simple defects. It's weaker on edges, textured transitions, beard lines, and areas near nostrils or lips. That's where Clone Stamp gives you more control.
With Clone Stamp, you choose the source. That matters around facial hair and sharp transitions, where automatic sampling often pulls from the wrong texture. If a blemish sits near a beard edge, sample from adjacent beard texture. If it sits on the cheek near a highlight, sample from the same brightness zone. Matching texture without matching tone is sloppy retouching. Matching both is the job.
Advanced texture control with frequency separation
High-end retouching distinguishes itself from quick cleanup. Frequency separation splits the portrait into two working problems. One layer carries color and tone. The other carries texture and fine detail. Once those are separated, you can fix each one without damaging the other.
That solves a common failure in automated blemish removal. A blotchy red patch is usually a color problem. A raised bump is partly a texture problem. If you attack both with one blur-based tool, you often create waxy skin.

Split color from texture
The setup has a few steps, but the logic is simple. Duplicate the image twice. Blur the lower duplicate until pores disappear but facial forms remain. That becomes your low-frequency layer. Build the upper layer so it holds only texture detail. Set the blend so both layers recombine into the original look.
Once that's built, your choices get cleaner. You can soften redness or uneven tone on the low-frequency layer with a soft brush and careful sampling. Then you can fix tiny pore-level interruptions on the high-frequency layer with healing or clone tools.
Frequency separation works because skin isn't one thing. Tone and texture need different treatment.
A visual walkthrough helps if you haven't built the stack before:
Why this matters more on varied skin tones
Automated blemish tools often struggle when the correction area contains subtle hue shifts. That gets more obvious on darker, olive, or richly varied complexions. A 2024 report by the International Association of Photo Editors found that 42% of users with non-Caucasian skin tones reported color shifts or halo effects after using standard blemish removers. That's the exact kind of problem frequency separation is built to avoid.
Instead of asking one tool to solve everything, you isolate the issue. If the texture is fine and only the redness is wrong, stay on the color layer. If the tone is fine but there's a raised dry patch, stay on the texture layer. You stop forcing one correction to do two jobs.
A short comparison makes the benefit obvious:
| Workflow | What it fixes well | What it often breaks |
|---|---|---|
| One-click skin smoothing | Fast cleanup of obvious distractions | Texture, pore detail, natural tonal variation |
| Spot Healing only | Small isolated blemishes | Larger color inconsistencies |
| Frequency separation | Color and texture independently | Setup time, operator skill |
This isn't the fastest method. It's the method that gives you the most control while keeping the face believable.
Sculpting with light using dodge and burn
After cleanup, a portrait can look a little flatter than it did at capture. That's normal. Minor retouching removes distractions, but it can also reduce tiny contrast cues that make a face feel dimensional.
Dodge and burn puts that dimension back. Not by reshaping the person. By reinforcing light where the camera or retouching softened it.
Use adjustment layers, not destructive painting
The cleanest method uses two Curves adjustment layers. One brightens. One darkens. Invert both masks to black, then paint in the effect gradually with a soft brush at very low opacity. Keep the moves small. Under-eye transitions, cheek contours, jaw definition, forehead hotspots. Those are the places where subtle correction pays off.
A destructive dodge or burn directly on the pixel layer usually gets heavy fast. Adjustment layers stay editable. You can lower opacity, refine the mask, or remove a section if the face starts looking worked on.
The best dodge and burn is almost invisible. You notice presence, not manipulation.
What you're correcting
Think in terms of unevenness, not makeover. A faint dark trough under one eye can make someone look tired in a still frame even if they didn't look tired in person. A slight burn along the far jaw can restore the face shape the lighting already suggested. A little dodge across a shadowed forehead transition can keep skin from reading dull.
This step works because portrait photography is light first. Retouching that ignores light always feels cosmetic. Retouching that respects light feels photographic.
If the face starts looking snatched, contoured, or too crisp, pull back. Corporate headshots need authority and realism. They don't need drama.
Team consistency and the automated professional
Manual retouching is excellent for one image. It gets complicated fast across a department, a hiring push, or a distributed company trying to standardize profile photos. The same careful steps still apply, but the operational burden changes everything.
Manual quality does not scale cleanly
You can automate setup in Photoshop. You can record actions for layer creation. You can standardize export settings. But you can't fully automate judgment with a generic template. One face needs less healing. Another needs careful texture protection around beard growth. Another needs color cleanup without changing skin identity.
That's why AI-assisted tools have become attractive. As Evoto's blemish removal workflow shows, modern editors can produce results in seconds with one click, replacing manual retouching that used to take hours. The speed is real. The trade-off is that speed alone doesn't guarantee believable portraits.
What a fast system still has to preserve
For professional teams, the target isn't just efficiency. It's consistency without plastic skin, mismatched tones, or over-smoothed features. That means any automated workflow still has to behave like a disciplined retoucher. It has to remove distractions selectively, preserve texture, and keep every person recognizable.

That's the practical standard for modern headshots. Speed matters. Quality matters more. The right system does both, especially when a company needs dozens of portraits to feel like they belong to the same brand without looking like they came out of the same blur filter.
AiHeadshots comes from Studio Pod in Houston, where photographers Joseph West and Chris Bailey built the system after shooting 10,000+ real professionals since 2019. That photographer heritage is the difference. AiHeadshots wasn't built by a software team retrofitting open models. It was built from a studio retouching standard. You upload 10 to 20 phone selfies. AiHeadshots delivers 30+ studio-grade headshots in about 30 minutes. Pricing starts at $29 for Basic, with Professional $39, Executive $59, and Teams volume pricing at 10+ seats for $22 to $29 per seat. The service includes a 100% money-back guarantee within 14 days, and AiHeadshots has served 30,000+ customers, delivered 255,000+ headshots, and holds a 4.9★ rating. Data handling is clear: 7-day input retention, 30-day output retention, and 90-day billing retention. If you want to see what that looks like in practice, visit AiHeadshots and compare options on pricing or upload your photos at try. Upload 10 selfies, see your first headshot in 30 minutes, $29.