


The surprising part isn't that a LinkedIn profile picture generator can produce a polished headshot. It's that the craft still matters more than the software. Give a system weak selfies, vague style direction, and no editorial judgment, and you'll get a weak portrait back. Give it clean source images, a clear brief, and a photographer's eye, and the result can rival work that used to require a booked studio session.
That shift is real. AI-powered LinkedIn profile picture generators now let people generate headshots for as little as $29 instead of paying $150 to $400 for a traditional photographer, and many services deliver results in under an hour, according to Clementine Design Studio's review of AI professional headshot generators. For professionals who need a stronger profile photo this week, not next month, that's a practical change.
Table of Contents
- The Foundation, Preparing Your Input Selfies
- Defining Your Look, Styles, Backgrounds, and Light
- From Selfies to Headshots in 30 Minutes
- The Photographer's Eye, Selecting Your Best Shot
- Exporting for LinkedIn and Brand Consistency
- AI Headshots, Privacy, and Building Trust
The Foundation, Preparing Your Input Selfies
A LinkedIn profile picture generator is pure input and output. If the source photos are sloppy, the result is sloppy. Photographers have always called this in a different way. Bad source material costs you options later.
Modern AI headshot tools typically ask for 10 to 20 selfies, with a minimum of 8 shoulder-up images and 2 face, neck, and chest images, so the system can learn facial features without obstructions or filters, as noted in this video breakdown of AI headshot photo requirements. That number isn't arbitrary. The system needs variation, but it also needs consistency.

What the system needs to see
The best uploads are boring in the best possible way. Clear face. Neutral camera processing. No visual clutter. No dramatic effects.
Use a window. Stand facing it, not with it behind you. Natural light gives the cleanest information about your face shape, skin texture, and eye area. Overhead kitchen lighting creates shadows under the brow and chin. That hurts more than people think.
Practical rule: Your input selfies aren't the final portrait. They're reference material. Treat them like clean raw files, not social posts.
For a reliable set, keep these principles in mind:
- Keep your face unobstructed. No sunglasses, hats, heavy shadows, or hair covering one eye.
- Vary the angle slightly. Include straight-on images plus small turns left and right. Don't send the same smile copied 10 times.
- Stay solo. Group photos confuse face learning. Crop tight if needed before upload.
- Skip filters and beauty apps. Smoothed skin and altered features reduce realism later.
If you want a detailed upload checklist, the selfie upload guide from AiHeadshots is a useful practical reference.
How to shoot the selfies properly
Hold the phone slightly above eye level, not below your chin. Chin-up selfies distort the jaw and nostrils. Extreme high angles do the opposite and thin the face unnaturally. Keep the lens clean. That's a small point, but a smudged lens softens detail fast.
Clothing matters even in the reference set. Wear simple tops in solid colors. Avoid loud patterns and logos. They don't help the system understand your face, and they can pull attention in the wrong direction.
Use a range of expressions. A relaxed neutral look. A small smile. A broader smile. That variety gives the generator room to produce portraits that feel human instead of fixed. The goal isn't to look like a model. The goal is to give the system honest information about what you look like on a good day.
Defining Your Look, Styles, Backgrounds, and Light
A strong LinkedIn portrait is built, not guessed. Style choices shape how people read your competence before they read a single word on your profile. We approach this the same way we would approach a commissioned headshot session. Start with the role, the audience, and the impression the portrait needs to carry.

What different backgrounds say
Background is part of the portrait language. It tells the viewer whether this person feels corporate, creative, modern, conservative, approachable, or distant.
A neutral studio gray usually reads formal and dependable. That fits law, finance, consulting, and senior leadership. A bright office setting feels current and collaborative, which often works well for tech, recruiting, and client-facing teams. Outdoor and lifestyle backgrounds can work too, but they need restraint. If the setting has more personality than the subject, the image stops functioning as a professional headshot.
The same rule applies to framing. Keep the face clear, dominant in the composition, and easy to read at thumbnail size. LinkedIn does not reward nuance in the background. It rewards recognition.
A good linkedin profile picture generator gives you options. Good judgment turns those options into a portrait that fits the job.
Light changes the message
Light decides mood faster than wardrobe does. Soft, directional light tends to be the safest choice for LinkedIn because it flatters skin, keeps the eyes bright, and gives the portrait a clean, open read. Strong contrast can add authority, but it also adds tension. That can help a speaker, founder, or consultant with a strong personal brand. It can also make an otherwise solid portrait feel too dramatic for hiring managers or recruiters.
We built our tool around that trade-off. The goal is not to create a flashy image. The goal is to create a portrait that looks intentional, current, and believable.
Wardrobe should support that same read. Dress one step above your normal working standard. In legal, finance, and executive roles, that often means formal business clothing. In design, product, or software, polished business casual usually feels more natural than a full suit. The best results look aligned with your real work life, not dressed up for costume value.
For comparing looks before you generate, use this guide to choosing headshot styles and backgrounds. It helps narrow the visual direction before you spend time sorting through outputs.
From Selfies to Headshots in 30 Minutes
A usable LinkedIn headshot no longer needs a studio booking, calendar coordination, and a retouching queue. With good input photos and clear style choices, you can go from phone selfies to credible professional portraits in the time it used to take to confirm a shoot.

What the process looks like
From a photographer's perspective, the speed comes from removing setup friction, not skipping judgment. The work still depends on choices that matter: which selfies you upload, how consistent those inputs are, what wardrobe direction you choose, and whether the final set matches how you present yourself in real professional settings.
A modern generator compresses the production side of portrait-making. You upload your prepared selfies, pick the package that fits your needs, choose a visual direction, and let the system render options while you return to work. That changes the timeline from a multi-step booking process to a short production cycle you can fit into a lunch break.
Cost is part of the appeal, but it is not the whole story. A traditional headshot session often includes a photographer's time, lighting setup, coaching, selects, and retouching, so the price reflects real craft. An AI workflow trades some of that hands-on control for speed, convenience, and a lower barrier to updating your image more often.
That trade-off is often worth it.
Why speed matters
The practical benefit shows up when a profile needs to change now, not next month. Job seekers updating after a role change, founders preparing for press, recruiters refreshing team profiles, and sales professionals cleaning up prospect-facing pages all run into the same problem. The old process asks for scheduling energy people rarely have.
Fast turnaround solves that bottleneck. It makes it easier to replace an outdated crop, swap in a portrait that matches your current role, or create a set of options for different platforms without turning the task into a project.
This walkthrough shows the broader method behind fast generation and stronger prompts when people want tighter control over the outcome:
We built our process to feel closer to a compact portrait session than a software exercise. The tool should handle rendering. You should stay focused on the photographic questions that matter: Does this look like you, does it fit your field, and would a hiring manager trust it at a glance?
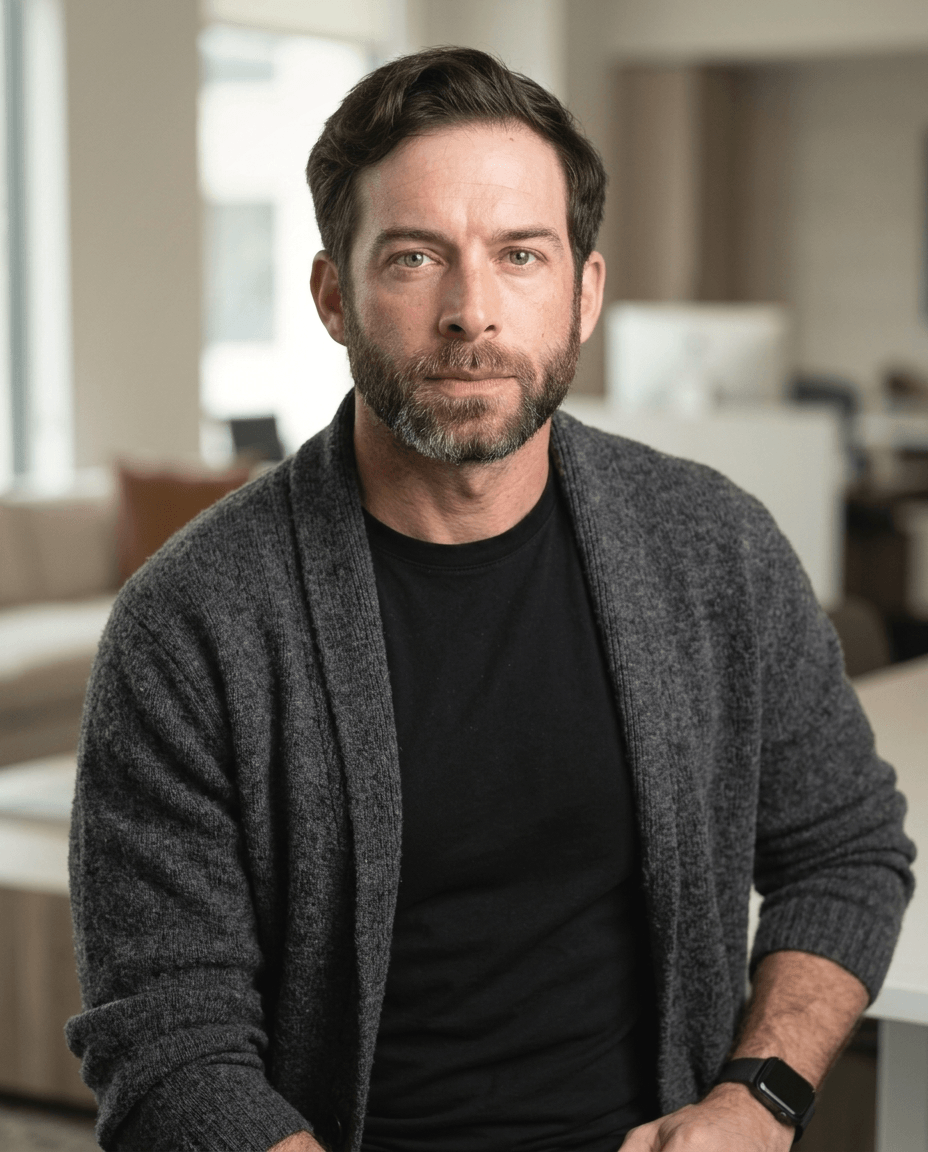
The Photographer's Eye, Selecting Your Best Shot
The final select does more damage than the prompt if you get it wrong. A weak pick can make a polished set feel generic, while the right frame can carry the whole profile.

Expression first
Start with expression. If the face feels vacant, over-rehearsed, or too polished, discard it early. LinkedIn rewards trust, and trust shows up in small things: engaged eyes, a relaxed mouth, and enough restraint that the smile still feels earned.
A common mistake is choosing the image that feels flattering in isolation instead of the one that reads well to a stranger in a tiny circle crop. Those are not always the same frame.
Ask a harder question than "Do I like this?" Ask, "Would this person look credible to a hiring manager, client, or investor at a glance?" If the answer is unclear, keep editing.
Choose the portrait that feels credible at thumbnail size. That is how the platform presents you first.
Composition and realism
Once expression is right, judge the frame. LinkedIn portraits usually work best when the face has enough presence to read on mobile, but not so much that the crop feels cramped. Keep the composition clean, with simple wardrobe, direct eye contact, and a background that supports the subject instead of competing with it. If you want a practical benchmark for crop and presentation, these LinkedIn photo tips for framing and common mistakes are useful.
Then zoom in.
Eyes, teeth, hairline, collar edges, and visible hands reveal weak generation faster than anything else. Good portrait work keeps skin texture, catches natural asymmetry, and holds believable transitions around the jaw and hair. Bad output looks waxy, too symmetrical, or slightly broken around the edges.
A fast review table helps:
| Check | What works | What fails |
|---|---|---|
| Expression | Relaxed, engaged, believable | Frozen smile, distant eyes |
| Crop | Face fills the frame cleanly | Too wide, too tight, awkward shoulder crop |
| Background | Quiet and supportive | Distracting or fake-looking |
| Detail | Natural skin and clean edges | Waxy skin, strange teeth, broken hair |
Run one last practical test before you export. Shrink the image to thumbnail size, then compare it against LinkedIn's current display requirements in this 2026 LinkedIn graphic size guide. If the eyes still hold attention and the crop stays clean, you have your winner.
If you're stuck between two strong options, pick the one that looks more like you on a sharp workday. Accuracy beats glamour.
Exporting for LinkedIn and Brand Consistency
A strong portrait still needs a clean handoff to the platform. If the crop is off, the image is too loose, or the file gets compressed badly, you lose quality in the last two minutes of the process.
Crop for the platform
Start with a square crop and keep the eyes high enough in frame that the circular LinkedIn crop doesn't cut into the forehead or chin. Check the preview on desktop and mobile. LinkedIn's interface changes over time, so it's smart to compare your final image against a current 2026 LinkedIn graphic size guide before uploading.
Use one final export and stick with it. Don't upload one version to LinkedIn, a second to your company bio, and a third to your speaking page if they all look slightly different. Consistency beats variety here.
The portrait isn't just a file. It's part of your visual identity system.
Use one portrait system everywhere
Once you've picked the final image, apply it across the places that matter. LinkedIn first. Then your company team page, email signature, conference speaker page, proposal deck, and any staff directory that clients see.
If you're refining the image specifically for LinkedIn, the LinkedIn photo tips from AiHeadshots offer useful practical guidance on crops, framing, and common mistakes. For teams, the same principle scales. A consistent portrait style across departments makes a company look organized, current, and intentional. Mixed headshots do the opposite. One person has a studio gray background, another has a wedding crop, another has a car selfie. That visual noise adds up fast.
AI Headshots, Privacy, and Building Trust
The trust question around AI headshots is real, and it isn't settled. There's still a lack of clear, data-backed guidance on how often AI-generated LinkedIn portraits are seen as trustworthy or fake by recruiters and peers. LinkedIn doesn't explicitly ban AI images, and some experts still recommend real photos for long-term credibility, as discussed in this analysis of AI-generated images on LinkedIn profiles.
The trust question is really a quality question
Most skepticism isn't about the tool category. It's about bad execution. A weak AI portrait looks fake for the same reason a weak retouched studio portrait looks fake. The skin is too smooth. The expression is off. The light doesn't match the face. The image looks manufactured.
The answer isn't to avoid the category altogether. It's to use judgment. If the portrait looks like you, reads naturally, and matches the level of polish expected in your field, people accept it as a professional image. If it looks uncanny, don't use it.
Privacy matters as much as realism
People are right to ask what happens to their source images. A credible service should answer that plainly. At AiHeadshots, input selfies are retained for 7 days, generated headshots for 30 days, and billing retention is 90 days. That kind of specificity matters because you're not just uploading a photo. You're uploading your face.
Your LinkedIn setup should also be private by design. If you're reviewing profile visibility, search discovery, and account exposure, this guide on how to configure LinkedIn data privacy is a useful companion to the photo side of the process.
The broader point is simple. Trust comes from realism, restraint, and transparency. The best AI headshots don't announce themselves as AI. They read as well-made portraits.
Upload 10 selfies, see your first headshot in 30 minutes, starting at $29 with AiHeadshots.